abbrv
  • write
  • draft
  • rules
  • help
  • system: select

    • New
    • Delete
    • Import
    • Export
    • Upload
  • Discord
Upload your system

System upload is currently only supported through Github. This is to allow us to run automated validation checks to ensure that your uploaded files are safe and correctly formatted, and to provide ease-of-use commands to facilitate merging into the master branch.

To upload a new system, please follow these steps:

  • Create a new GitHub Gist
    • Drag-and-drop your [glyphs, modes, rules, phrases].json files.
    • Make sure they're uploaded as four separate files.
  • Open a new issue on the abbrv repo
    • GitHub will post a comment with additional instructions.
  • Add a comment to the issue with the command: /submit [url_of_your_gist]
    • This will automatically validate the files from your gist and open a new PR for merging your results.

If you do not have a Github account, contact u/jerrshv on Reddit for assistance.

Available systems

Help


For immediate help, please join the abbrv Discord channel. To report a bug, open an issue on the git repo. If neither of those options work for you, contact u/jerrshv on Reddit.


Table of Contents

  • Overview
    • Terminology
    • Basics
  • Designing a system
    • Drafting your glyphs
    • Abbreviating common phrases
    • Introducing modes
    • Defining pre-processing rules
    • General advice
  • Writing
  • Exporting and sharing your system
  • Conclusion

Overview


This page outlines the key functionalities of abbrv and how it can be used to design a shorthand system. Note that this program was built with orthographic systems in mind (Orthic, in particular), and that as a result some of the functions and design choices may be better suited for working with these systems. While it should still be possible to use abbrv to design a phonetic system (e.g., by building glyphs for each phenome), this has yet to be done and may require some additional development to better address the needs specific to phonetic systems.

Terminology

In abbrv, the following terminology is used:

  1. Character: individual characters in an alphabet, punctuation, or digits. Examples would be a, b, and c, as well as ., !, and 3.

  2. Glyph: a representation of one or more characters. For example, a, b, and c may all have their own glyphs, as might th, sh, or oa.

  3. Phrase: one or more longhand words which may be represented using a single glyph. For example, the, of the, or able to do.

  4. Mode: a new glyph, or a modified form of an existing glyph, which is used in specific cases depending upon the surrounding text. For example, in Orthic, the practice of omitting th- at the beginning of a word and elevating the subsequent glyphs above the baseline.

Basics


Before doing anything, you must first select the system that you want to use (or select New to create a new one):
The system selector dropdown menu.
The system selector dropdown menu. Choose a system to begin writing in it on the write page or editing it on the draft page. If no system is selected, any edits you make will be for a new system, which you can then export to store locally on your computer. The currently available systems are listed first, followed by the buttons:
New: start designing a new system.
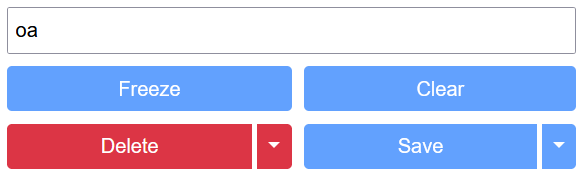
Delete: delete the currently-selected system.
Import: import an existing system from your local files.
Export: export your current system to a local file.
Upload: upload the current system to the shared repository.
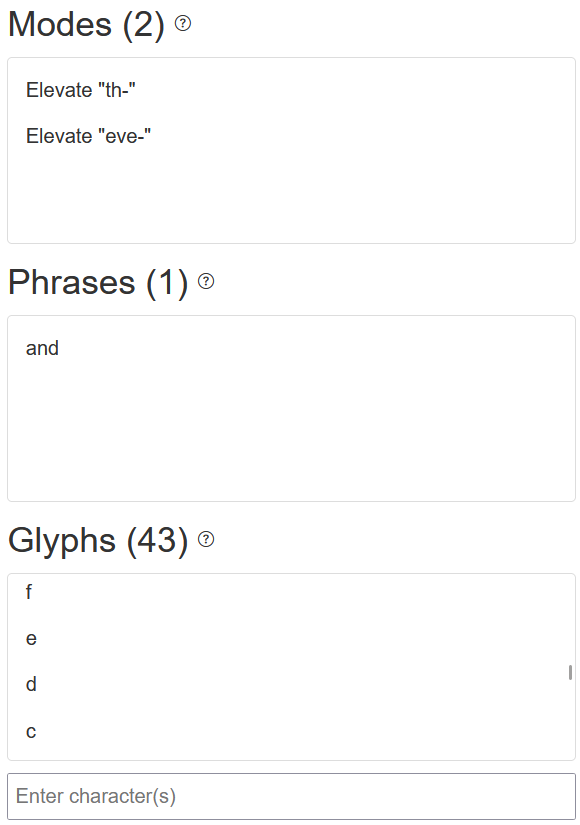
Once you have selected a system, it will be useful to review the basics of how abbrv processes text, converts words to glyphs, and draws the glyphs. Understanding these rules will be particularly useful when designing your own system and debugging any issues.

The following steps are applied in order:

  1. Any user-defined rules are executed to modify the text.

  2. Any user-defined phrases are mapped to their corresponding glyphs (accounting for the modifications due to the previous step).

  3. All remaining un-mapped words are "tokenized" by parsing them from left to right, breaking them up into their possible glyphs based on the defined glyphs and modes. For example, the word match could be decomposed into the glyphs m, a, and tch (in Orthic). that could be decomposed into the glyphs th-, a, and t. When a word has multiple possible tokenizations, the "best" tokenization is chosen in the following way:
    1. The tokenization with the most modes used is preferred.
    2. If both tokenizations use the same number of modes, the tokenization with the fewest tokens is preferred.
    3. If both tokenizations use the same number of modes and tokens, the tokenization with longest individual tokens is preferred.

  4. All words are drawn in the following manner:
    1. The first glyph in a word is drawn as-is, using the baseline as the origin.
    2. Subsequent glyphs in the same word are shifted so that the first knot of the current glyph aligns with the last knot of the previous glyph.
    3. A fixed length-space is added between two words based on the right-most point of the first word and the left-most point of the second word.
    4. For multi-line text, baselines are shifted vertically to ensure a fixed width between the highest point of the current line and the lowest point of the previous line.

Designing a system

Using abbrv to design a new shorthand system will typically involve four main steps: 1) drafting your glyphs, 2) abbreviating common phrases, 3) introducing modes, and 4) defining pre-processing rules.

Drafting your glyphs

A glyph is defined using one or more cubic splines. Individual splines are created by specifying the positions of the spline knot points, which are then smoothly interpolated between to construct the spline.
Splines for the glyphs of the characters 'a', 'b', and 'c' in Orthic. Knot points for each spline are shown in red.
Splines for the glyphs of the characters a, b, and c in Orthic. Knot points for each spline are shown in red.
Glyphs are allowed to start and end above or below the baseline. If such glyphs occur at the beginning of a word, this could mean that the word will not start at the baseline either.
Splines for the glyphs of the characters 'g', 'w', and 'v' in Orthic. Since their first knot points are not at (0, 0), these glyphs do not start at the baseline.
Splines for the glyphs of the characters 
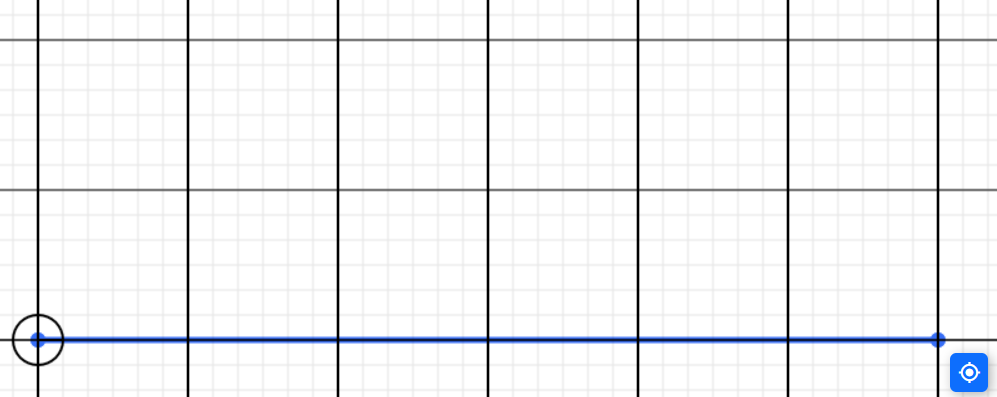
g, w, and v in Orthic. Since their first knot points are not at (0, 0), these glyphs do not start at the baseline.
If a glyph uses multiple splines, each spline is drawn separately, which may be useful when defining a glyph with sharp breaks in it.
The Orthic glyph for the word 'does', which uses two splines ('d' and 's') that are joined with a sharp break between them.
The Orthic glyph for the word 
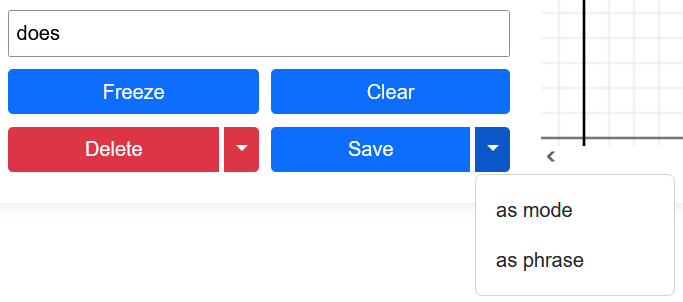
does, which uses two splines (d and s) that are joined with a sharp break between them.
A glyph may also use multiple splines if it needs to have separated segments.
The Orthic glyphs 'i' and 'oa'. Separate splines are used to draw the dot in 'i', and to draw the 'a' above the 'o' in 'oa'.
The Orthic glyphs 
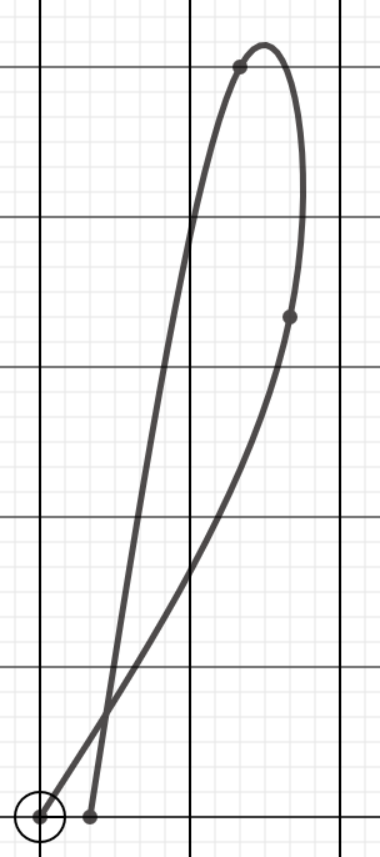
i and oa. Separate splines are used to draw the dot in i, and to draw the a above the o in oa.
As described above, subsequent glyphs in the same word are shifted so that the first knot of the current glyph aligns with the last knot of the previous glyph. This means that when defining a multi-spline glyph, you must always start the first spline at the point where it should join to the previous glyph, and end the last spline at the point from which the next glyph should continue. This can lead to some confusing behavior when designing a glyph. For example, the i drawn in the figure above is actually composed of three splines: the slanted line, the dot above the slanted line, and a second dot which overlaps with the end of the slanted line to ensure that it joins properly to the next glyph. The oa glyph also has a third spline at the end of the longer line for the same reason.
The Orthic glyphs for the words 'it' and 'oat'. Note that the 't' spline connects to the top of the 'i' in 'it' and the end of the longer line in 'oa', since this is where the glyphs were designed to end.
The Orthic glyphs for the words it and oat. Note that the t spline connects to the top of the i in it and the end of the longer line in oat, since this is where the glyphs were designed to end.
The draft page provides you with all of the functionality necessary to design the glyphs for the individual characters (or phonemes) in your system.

The grid editor is used to visualize and edit your glyphs:
The grid editor panel of the draft page.
Left-click: add a knot point
Right-click: remove a knot point
Ctrl + left-click: start a new spline
Center button: center the view at the origin
When working with multi-spline glyphs, using ctrl + left-click to start a new spline allows you to create separated segments and specify the start/end points of the glyph. Note that only the knot points for the spline which is currently being edited are shown.
One spline is used for the 'o' in the glyph 'oa'. The beginning of the first spline defines the start of the glyph.
One spline is used for the 
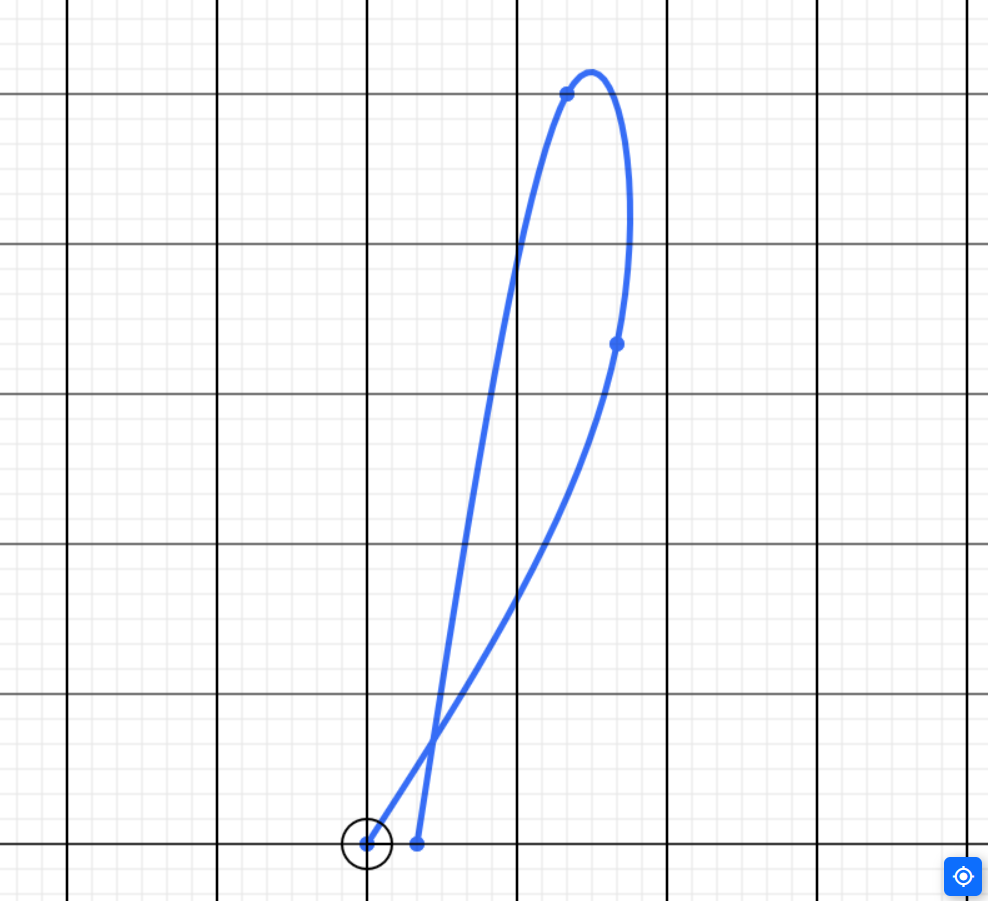
o in the glyph oa. The beginning of the first spline defines the start of the glyph.
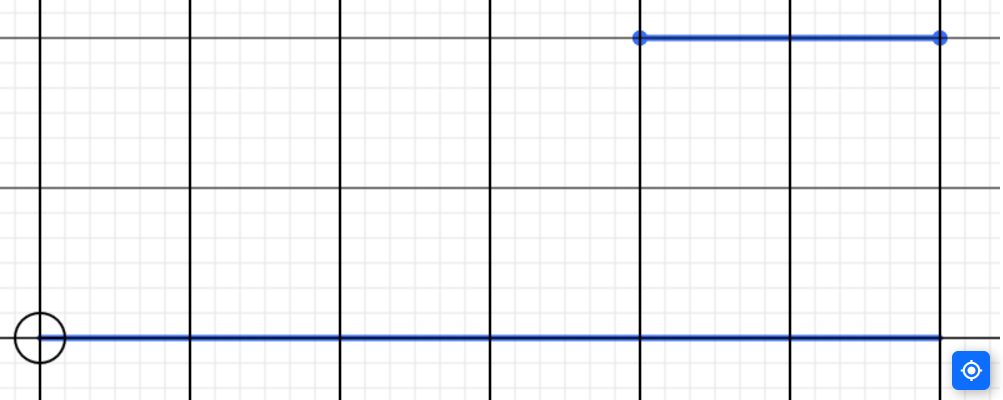
A second spline is used for the 'a'.
A second spline is used for the a.

And a third spline is used to specify the end of the glyph when joining to the next glyph in a word.
The buttons panel can be used for saving, deleting and "freezing" glyphs, and for clearing the currently selected spline.
A second spline is used for the 'a' in the glyph 'oa'.
The buttons panel and text fieldl of the draft page.
Save: save the current splines as a glyph corresponding to the text in the text field
Delete: delete the glyph a glyph corresponding to the text in the text field
Freeze: paint all the current splines onto the background
Clear: clear the currently selected knot points
Frozen splines are painted onto the background, which can be useful when making adjustments to a glyph. If a spline is frozen, the 'Freeze' button will change to 'Unfreeze', which will remove the painted splines.
Frozen splines are painted onto the background, which can be useful when making adjustments to a glyph. If a spline is frozen, the "Freeze" button will change to "Unfreeze", which will remove the painted splines.
The list panels will show the currently saved glyphs, phrases, and modes.
Left-click: select a glyph and display its splines.
Ctrl + left-click: select a new glyph and append its splines to the current glyph.


Abbreviating common phrases

When saving a glyph, you can choose the "as phrase" option to specify that the glyph corresponds to an entire word or phrase. This is similar to a regular glyph, with the difference that it can only be used to represent an entire word rather than a subset of a word. For example, if you define a glyph for the word 
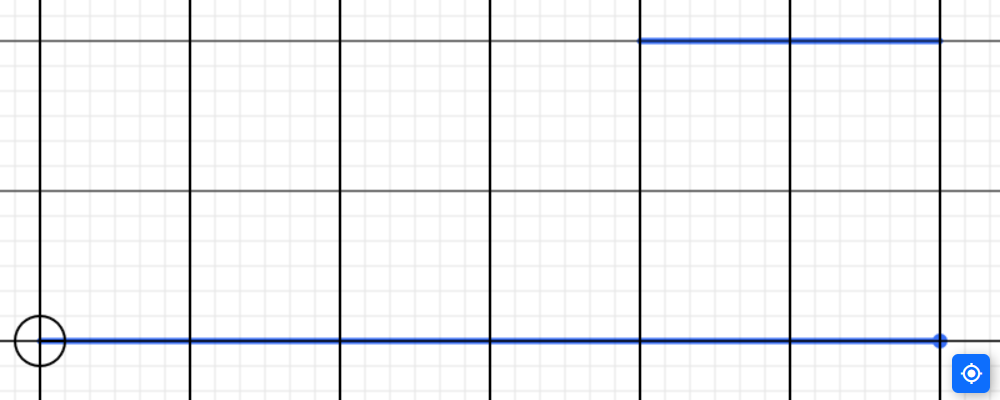
do, it will not also be used in the word adore. However, if you save do directly as a glyph (not as a phrase), then it will be applied in adore.
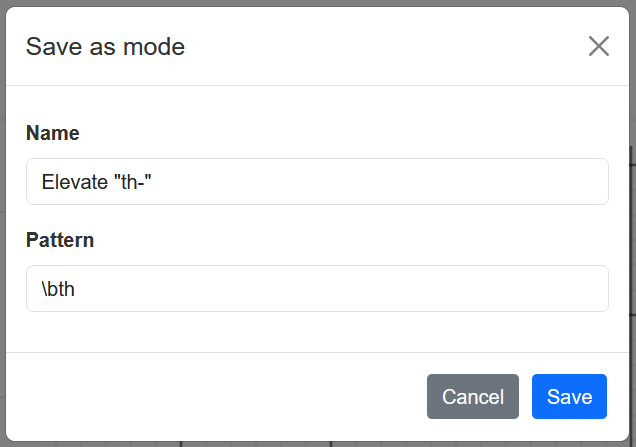
The save and delete buttons both have 'mode' and 'phrase' options for saving/deleting the glyph of the word or phrase specified in the text field.
The save and delete buttons both have "mode" and "phrase" options for saving/deleting the glyph of the word or phrase specified in the text field.


Introducing modes

A "mode" is similar to a phrase and a regular glyph, with the additional flexibility of being able to be used to replace any pattern using a regular expression. If you're not familiar with regexes, I recommend asking an LLM to write a regex for you (e.g. "please write a regex that matches 'a' and 'o' before 'm' or 'n'"), then using the site regex101 to make sure that the matching is working properly. Note that abbrv is written in JavaScript, which may affect some of the details of how a regex should be written (see this documentation for more details).
When saving a glyph as a mode, a popup window will appear to additionally specify the name of the mode and the regular expression pattern used for matching the mode.
Some examples of rules:
  • Name: elevate "th-""; regex: \bth.
  • Name: "ay" diphthong; regex: (?<![dtjqmnv])(ay|ya).
    • Note the use of (?<![dtjqmnv]) to only match (ay|ya) if not preceded by any of the letters dtjqmnv.
  • Name: "s" after "e/i"; regex: (?<=[ei])s(?![hlr]).
    • Note the use of (?![hlr]) to only match s if not followed by any of the letters hlr.
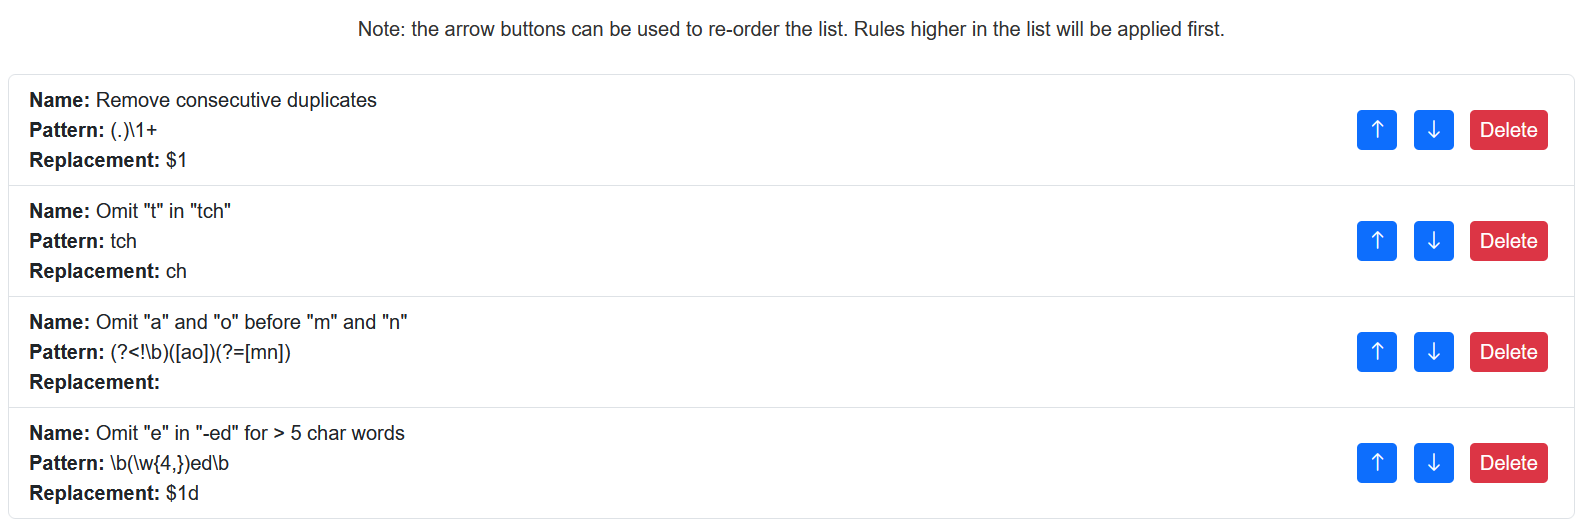
Defining pre-processing rules

A rule is a way of specifying find-and-replace operations that can be used to modify the text before mapping to glyphs. The rules page can be used for defining new rules.
A rule is created by specifying a name, one regular expression for matching patterns, and a second regular expression for replacing any matched patterns. If the second regex is left blank, any matches will be replaced with empty text (i.e., deleted).
The list of defined rules. Rules will be applyed in order from top to bottom. The arrow buttons can be used to rearrange the list. The delete buttons will remove a rule from the list.
Some examples of rules:
  • Name: Remove consecutive duplicates; regex: (.)\1+; replacement: $1.
    • Note the use of $1 for the replacement text, which replaces the matched pattern with the text prior to the match (following the JavaScript syntax).
  • Name: Omit "e" in "-ed" for > 5 char words; regex: \b(\w*?ed\b; replacement: $1d.

General advice

  • Start by defining glyphs for your alphabet or phenomes.
  • If implementing an existing system (Gregg, Pitman, Teeline, ...), try writing any examples from the system's documentation and adding modes/phrases/rules to your implementation as necessary.
  • Define your shorter glyphs first. Take extra care that they are exactly to your liking before moving on. This can help avoid having to repeatedly modify longer glyphs every time you make adjustments to the shorter glyphs that comprise them.
  • Avoid using too many modes. Modes are best used for prefixes, suffixes, and dipthongs.
  • You will go through multiple iterations of development. As you continue, try to increase the number of defined phrases and decrease the number of modes.

Writing

The write page can be used for testing out your newly-created shorthand system. This can be useful while drafting your glyphs to confirm that they are being drawn and joined as you expect them to be. The buttons can be used to choose which modifications you would like applied to your text:
The options, modes, rules, and download buttons.
The buttons on the write page.
Options: toggle universal options (use phrases, show knot points, show baselines, etc.)
Modes: toggle user-defined modes
Rules: toggle user-defined rules
Download: save the current image as an SVG

Exporting and sharing your system

By default, abbrv will only save your changes to the local storage of your browser. This means that if you clear your cache you may lose your progress. While this won't be a problem most of the time (unless you happen to clear your cache regularly), when you want to save your results or prepare them for submission to the public repository you can use the Export button.
The Export button will allow you to export your system as a ZIP folder, which can then be published to the public repository.
The Export button will allow you to download your system as a ZIP folder. The ZIP folder can then be submitted to the Github repository using the Upload button.
The exported ZIP file will contain four files: `glyphs.json`, `modes.json`, `phrases.json`, and `rules.js`.

Conclusion


Using abbrv, you can go from a bare-bones alphabet that only has single-character (or single-phenome) glyphs, to a fully-fledged system with complex abbreviations, modes, and rules. Consider, for example, this quote in "fully-written" Orthic (no abbreviations, modes, etc.):
The quote 'If you cannot do great things, do small things in a great way.' (Napoleon Hill) in Orthic, using only the simplest single-character glyphs and no additional rules or modes.
The quote "If you cannot do great things, do small things in a great way." (Napoleon Hill) in Orthic, using only the simplest single-character glyphs and no additional rules or modes.
Compared to the same quote written in the "ordinary" style with the following modifications applied:

  • (glyph) define the glyph if to make it smoother than joining i directly to f, and the correct height.
  • (mode) write you- as y.
  • (phrase) abbreviate cannot as cnt.
  • (phrase) abbreviate do as d.
  • (glyph) define the glyph gr to make it smoother than g joined directly to r.
  • (mode) smooth the dipthong ea.
  • (mode) omit the prefix th-, and elevate the rest of the word.
  • (mode) write the suffix -ings as a long downard curve with a sharp tail.
  • (rule) omit consecutive duplicate letters (the ll in small, even though you can't see it in the full version).
  • (mode) smooth the dipthong ay.
The same quote as above, but with multiple abbreviations, modes, and rules applied.
Have fun, and make something beautiful!